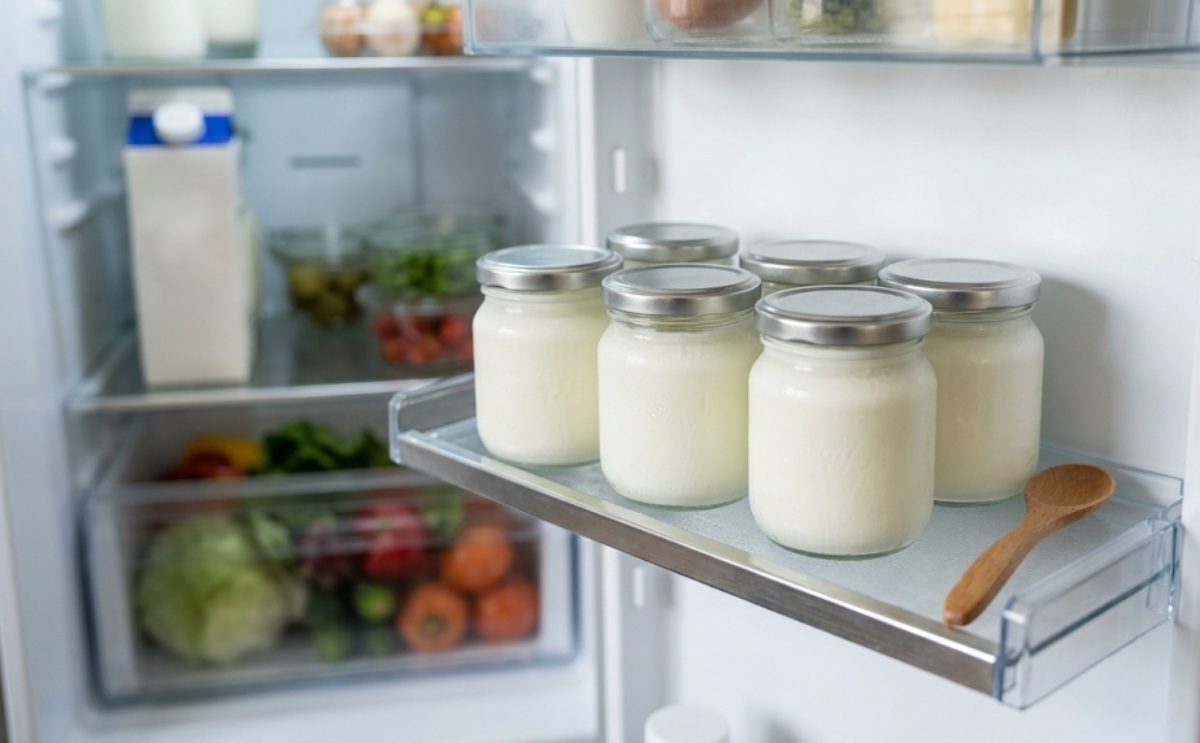
Want to eat yogurt regularly for health or weight loss but tired of buying it every time? Your electric rice cooker can save you money—and help you make creamy, homemade yogurt at home. Just mix milk with a bottle of thick fermented milk drink, set the right temperature and timing, and you'll have a mild, satisfying homemade yogurt.
How to make yogurt in an electric rice cooker
Temperature is the key when making yogurt in a rice cooker. Lactic acid bacteria thrive in a warm environment—around 40°C (about 104°F) is ideal. Some rice cookers’ keep-warm settings run hotter than that, so leaving them on constantly can throw off fermentation. A short heat-up followed by fermentation using residual heat usually works best.
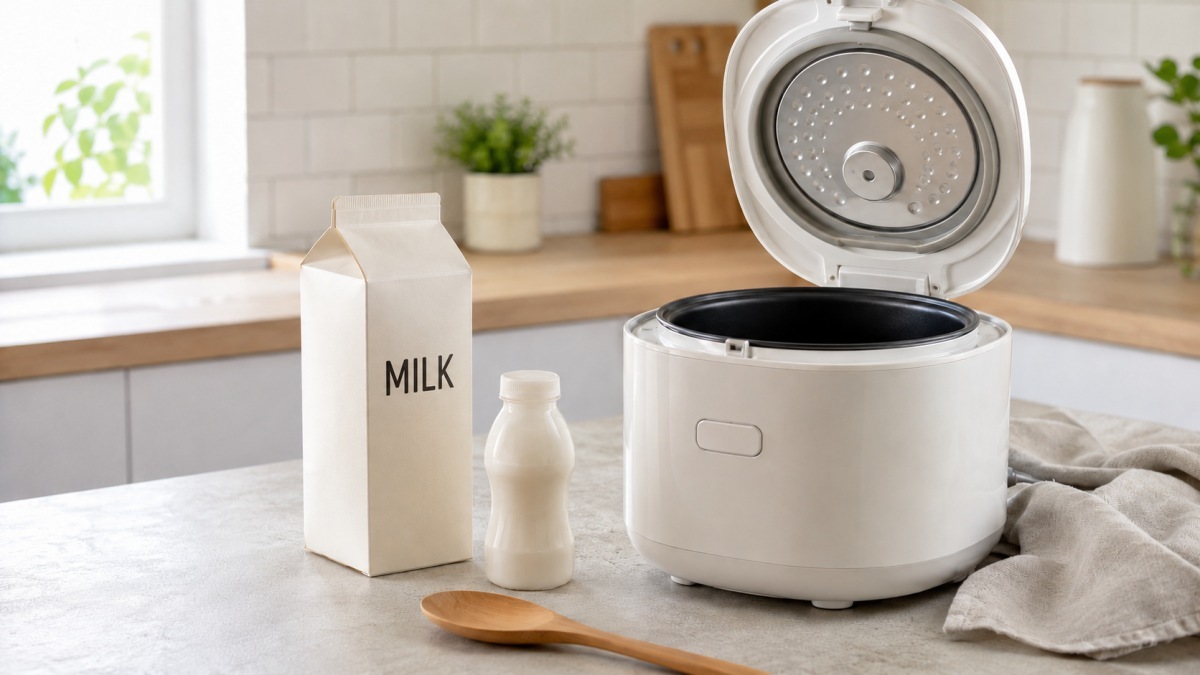
All you need is one carton of regular white milk—900 ml or 1,000 ml—and one bottle of thick fermented milk drink. Use plain milk with few additives. Low-fat, nonfat, or calcium-fortified milks can make the final yogurt thinner or less set. For your first batch, refrigerated pasteurized milk is the most predictable choice.
The thick fermented milk acts as your starter culture. When shopping, look for products labeled as thick fermented milk or similar—plain varieties are best. Fruit-flavored or very sweet options can leave unwanted flavors in your yogurt. If you want a clean, mild taste, choose a product with low sugar and few flavorings.
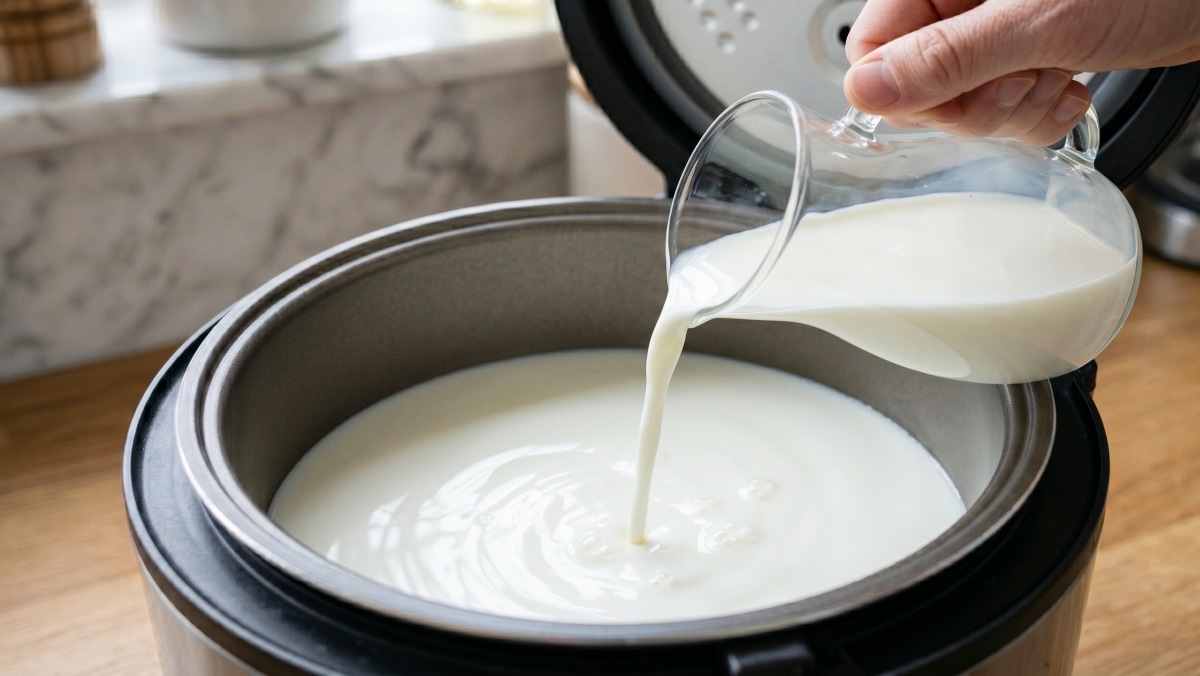
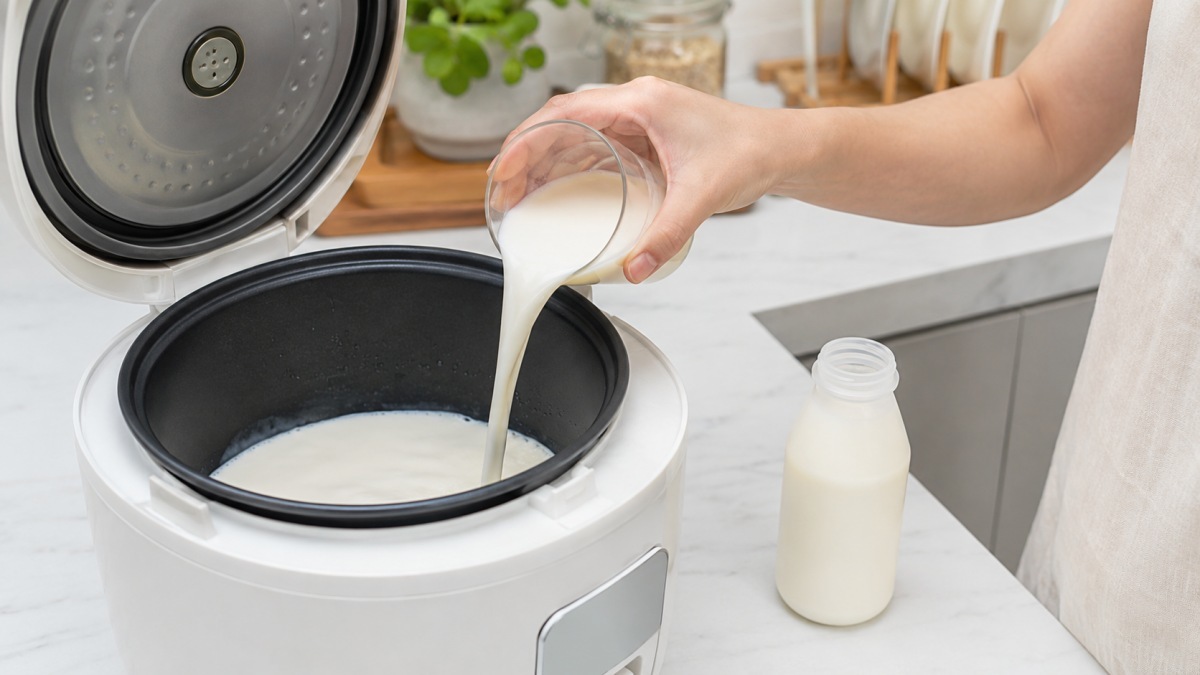
Pour the milk and the starter into the rice cooker inner pot and mix gently until even. Make sure your spoon or spatula is clean and completely dry before use. Metal tools won’t necessarily ruin fermentation, but wooden, silicone, or plastic utensils are kinder to the pot’s coating.
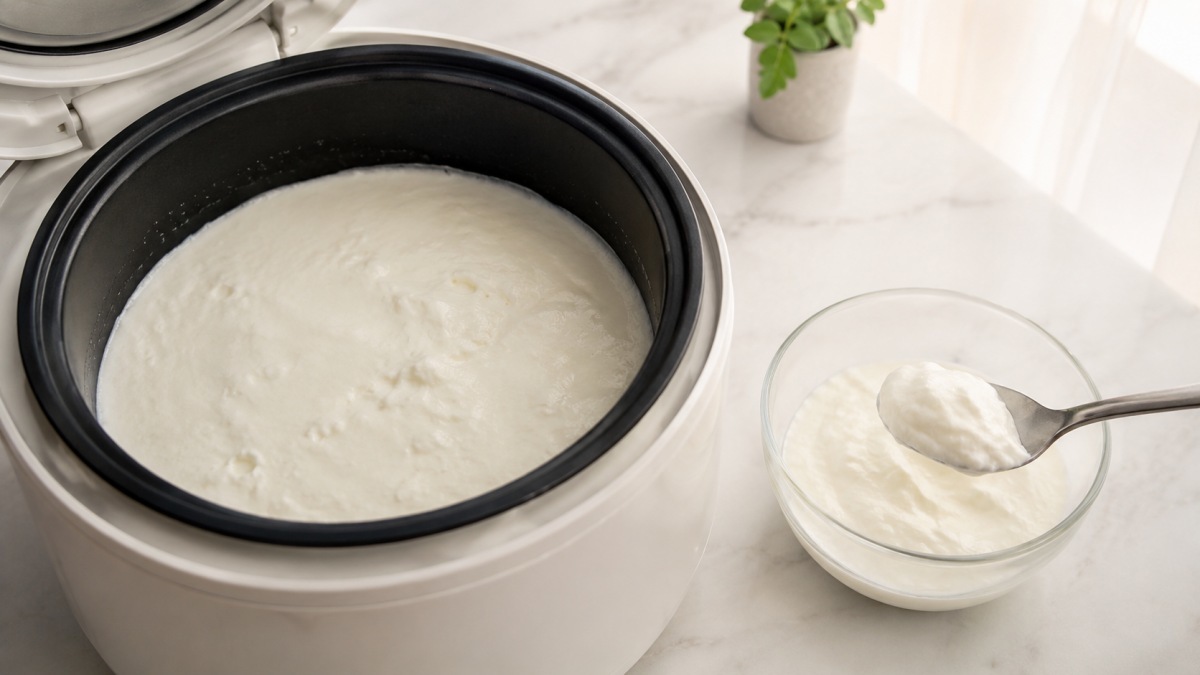
After mixing, turn on the rice cooker’s keep-warm function for about 1 to 1.5 hours. This brings cold milk up to a temperature where the cultures become active. Then turn off the keep-warm setting, close the lid, and leave the pot undisturbed for 8 to 10 hours so residual heat can finish the fermentation. Avoid opening the lid during this time—dropping the internal temperature can lengthen fermentation or leave you with runny yogurt.
Chill the finished yogurt in the fridge before eating. Cooling firms the texture and tones down the tang. Making it overnight and refrigerating in the morning is an easy way to fit this into your routine.
Choosing the right milk and starter
The flavor and texture of homemade yogurt depend a lot on your milk and starter. Stick to plain white milk with minimal additives. You can use ultra-pasteurized (UHT) milk, but results can vary; pasteurized refrigerated milk is more predictable for beginners.
Low-fat and nonfat milks usually yield thinner yogurt because of lower fat content. Protein- or calcium-fortified milks have different compositions and can affect fermentation, too. Add sugar, fruit, or nuts only after fermentation—mixing them in beforehand can make the texture and flavor inconsistent.
Pick a fermented milk product that contains live cultures—check the product type on the label. 'Fermented milk' and 'thick fermented milk' follow different standards; thick fermented milk generally contains many more live bacteria than regular fermented milk.
Ingredient temperature matters, too. Milk straight from the fridge takes longer to heat. Don’t leave milk out at room temperature for long for safety reasons—take ingredients out just before you need them and heat only to the required temperature during the keep-warm phase. In summer, when room temperatures are higher, avoid extending fermentation times excessively.
Hygiene is most important
Cleanliness is the most important factor when making yogurt at home. Yogurt develops as beneficial bacteria ferment milk, but unwanted microbes can cause off smells or flavors. Wash and fully dry the inner pot, jars, spoons, and cheesecloth before use.
Heat-resistant glass jars or stainless steel containers can be sanitized in boiling water. Avoid abrasive scrubbers or harsh detergents on the rice cooker inner pot to protect its coating, and rinse thoroughly to remove any detergent residue. Wash your hands well, and don’t reintroduce tools that have touched other foods once fermentation has started.
A thin clear layer of whey on the yogurt surface is normal—you can stir it back in or pour it off. But if the yogurt smells excessively sour, tastes bitter, or shows mold, discard it. Strange colors or unpleasant odors indicate spoilage, not proper fermentation.
Because homemade yogurt contains no preservatives, keep it refrigerated and eat it soon. Aim to finish it within 3 to 5 days and don’t keep it longer than a week. Store it in sealed containers toward the back of the fridge, and always use a clean spoon when serving.
Timing the keep-warm period
The most common reason yogurt doesn’t set is incorrect temperature or timing. If the keep-warm time is too short, the milk won’t get warm enough and bacterial activity will be slow. If it’s too long, the temperature can rise too high and destabilize fermentation. Since keep-warm temperatures vary by rice cooker, start with shorter times and adjust based on your results.
Use 1 to 1.5 hours of keep-warm time, followed by 8 to 10 hours of residual-heat fermentation as a baseline. In winter, cooler kitchens can slow fermentation; wrap the cooker in a towel to boost insulation or add a bit more fermentation time. In summer, higher room temps speed things up, so keep times conservative.
If your yogurt looks a bit runny right after fermentation, don’t panic—cooling often firms it up. If it’s still too loose after chilling, check your milk type, starter quality, keep-warm time, and hygiene practices.
Overly sour yogurt usually means fermentation went too long or the ambient temperature was too high. If the yogurt barely set and still tastes like milk, the temperature was likely too low or the starter didn’t have enough live cultures. Instead of chasing perfection on your first try, tweak times to match your rice cooker and the season.
Enjoying it as Greek yogurt
Turn basic rice-cooker yogurt into Greek-style yogurt by straining out the whey. Whey is the clear, slightly yellow liquid that forms on or beneath the yogurt. Removing it reduces volume but yields a thicker, tangier result.
To strain, you’ll need a strainer, a deep bowl, and clean cheesecloth. Set the strainer over the bowl, line it with cheesecloth, and pour in the yogurt. Cover and refrigerate for a few hours so the whey drains slowly into the bowl. Don’t leave it at room temperature—strain in the fridge.
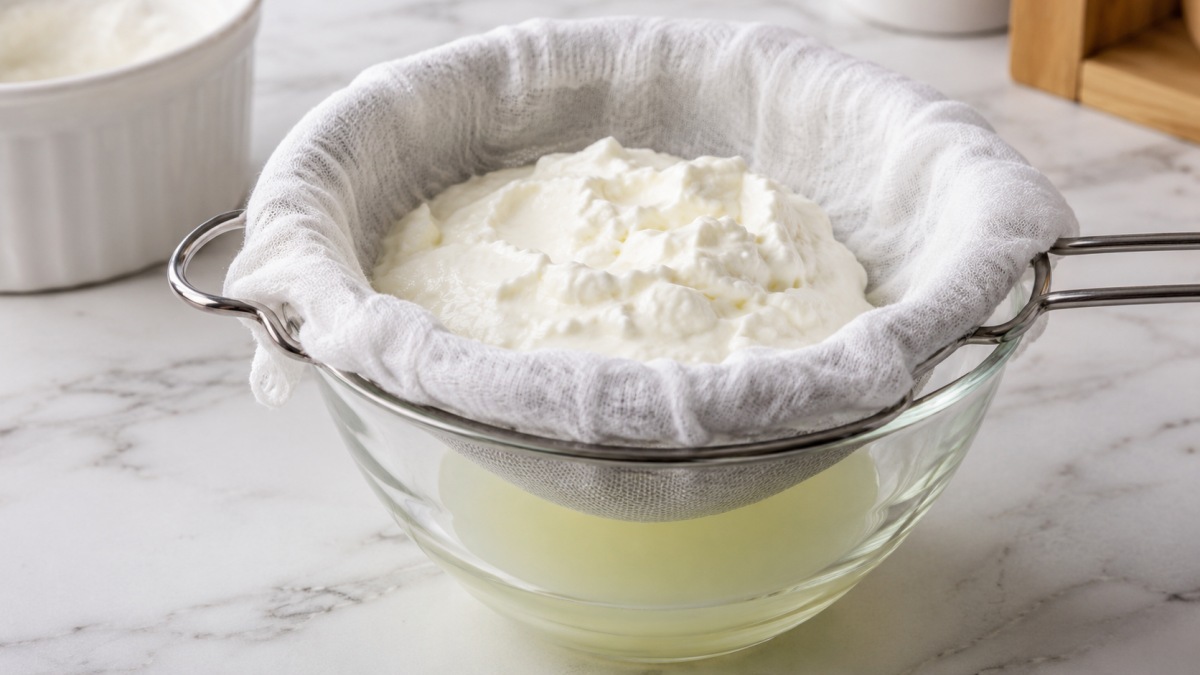
For a smooth, creamy Greek yogurt, strain for about 4 to 5 hours. For a firmer texture, strain 8 hours or more, checking occasionally so it doesn’t get too dense. A weight speeds up draining, but for your first batch it’s easier to let it drain naturally.
Use Greek yogurt on toast, with fruit and nuts, or as a base for dressings and sauces. A little drained whey can be added to bread or pancake batter. Keep whey refrigerated and use it quickly.
Making yogurt with a microwave or air fryer
No rice cooker? You can use a microwave. Mix milk and the thick fermented milk in a heatproof container, heat briefly in the microwave until lukewarm, then keep it closed so residual heat does the fermenting.
The microwave method is convenient but don’t overheat the milk—high heat can kill the cultures. Aim for a comfortably warm temperature you can feel by touch, and avoid opening the door during fermentation so the internal temperature stays steady.
If your oven or air fryer has a fermentation setting, use it. Devices that can hold around 40°C (about 104°F) provide a steady environment. Put the milk mix in a heatproof container, cover it, and use the fermentation function for several hours. This method offers better temperature control for consistent texture.
You can also use room-temperature starters like certain kefir or specialty cultures that don’t need preheating. These differ from using standard thick fermented milk, so follow the starter’s instructions and start with a small batch—room temperature and season can significantly change fermentation time.
How to serve and store
One big perk of homemade yogurt is controlling the sweetness. Homemade yogurt is naturally mild, so add what you like at serving time. Seasonal fruit, nuts, oats, granola, or a drizzle of honey turn it into a tasty snack or light breakfast.
Milder fruits like banana, blueberries, and apple pair especially well. Add nuts for crunch and satiety. Sweeten sparingly with honey or maple syrup, and add jam little by little until you reach the sweetness you want.

Yogurt also makes a great sauce base. Mix Greek yogurt with lemon juice, salt, and pepper for a simple salad dressing. Add chopped cucumber or herbs for a dip that’s perfect with bread or roasted veggies. Unsweetened plain yogurt is the most versatile for cooking.
Always refrigerate finished yogurt. Store it in smaller containers rather than one large tub to reduce contamination risk. Using the same spoon repeatedly can introduce saliva or other food and spoil the yogurt faster. Discard any yogurt that shows discoloration, mold, or an off smell.
Yogurt is healthy, but you don’t need to overdo it. Some people don’t tolerate dairy well. People with lactose intolerance may find fermented yogurt easier to digest than fresh milk, but reactions vary. Start with a small amount and watch your body’s response the first time you try it.